How to embed a video player using the Google Ad Manager (DFP) GPT tag
You can integrate video player or 3rd-party script within GAM third-party creatives, follow the instruction below:
Embed video player through DFP.
Step 1: Create a new Ad Unit
You can use an existing Ad Unit, or create a new one.
A. Go to the Inventory tab.
Fill in the required fields and choose the requested ad size, please choose 1x1 size.
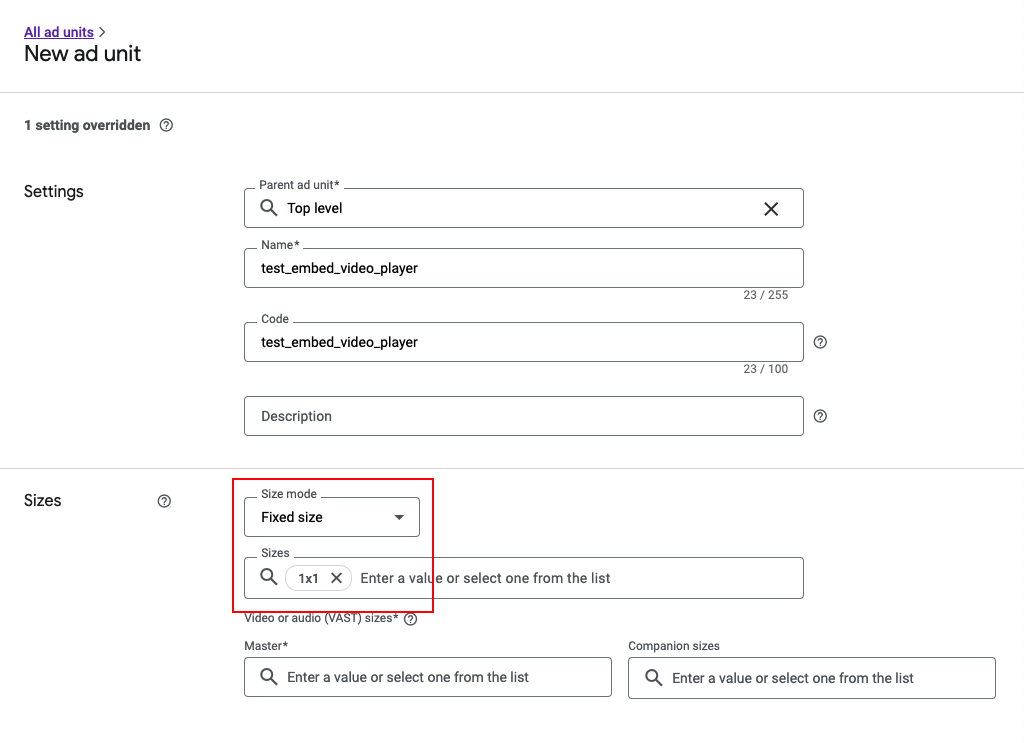
PLEASE NOTE: The size that you choose in the window above must align with the size you’ll select in the Line-Item/Creative.
B. In the "AdSense inventory setting" choose Override and then disable the checkbox: "Maximize revenue of unsold and remnant inventory with AdSense".
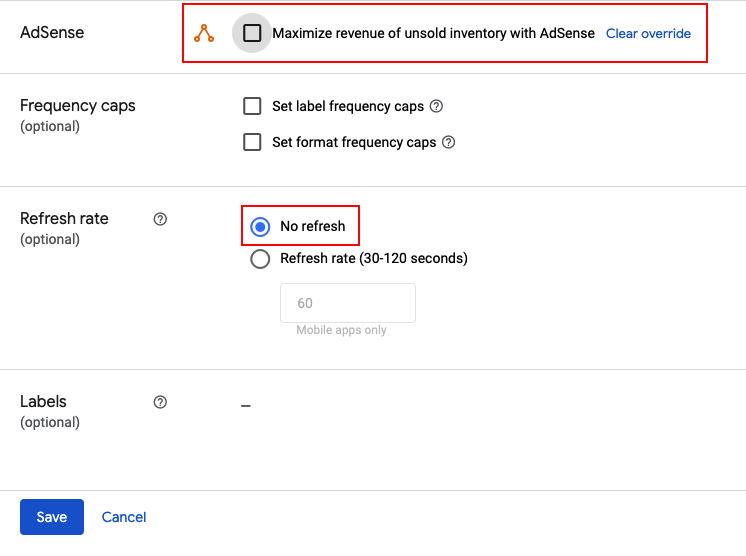
C. Click SAVE
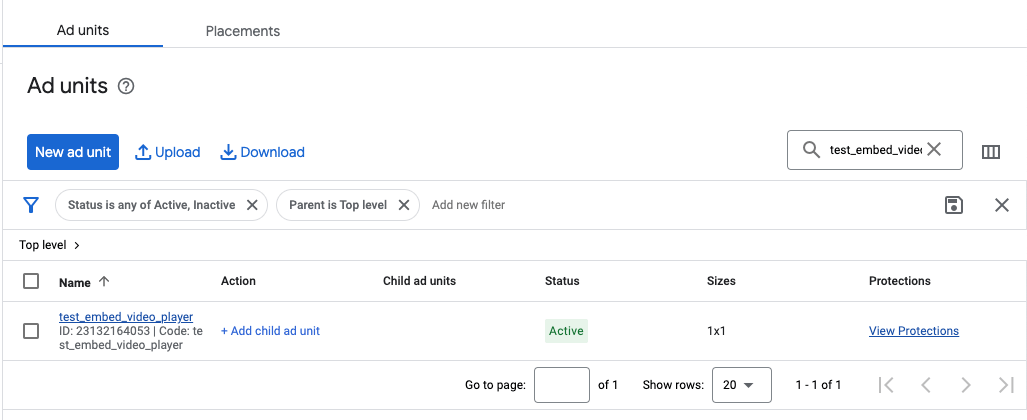
D. Search for the Ad Unit just created and enter into its settings.
E. Click on Tags
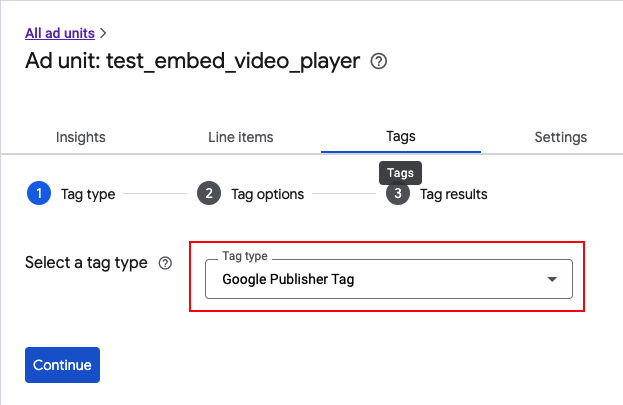
F. Select a tag type: Google Publisher Tag (GPT).
G. Click CONTINUE.
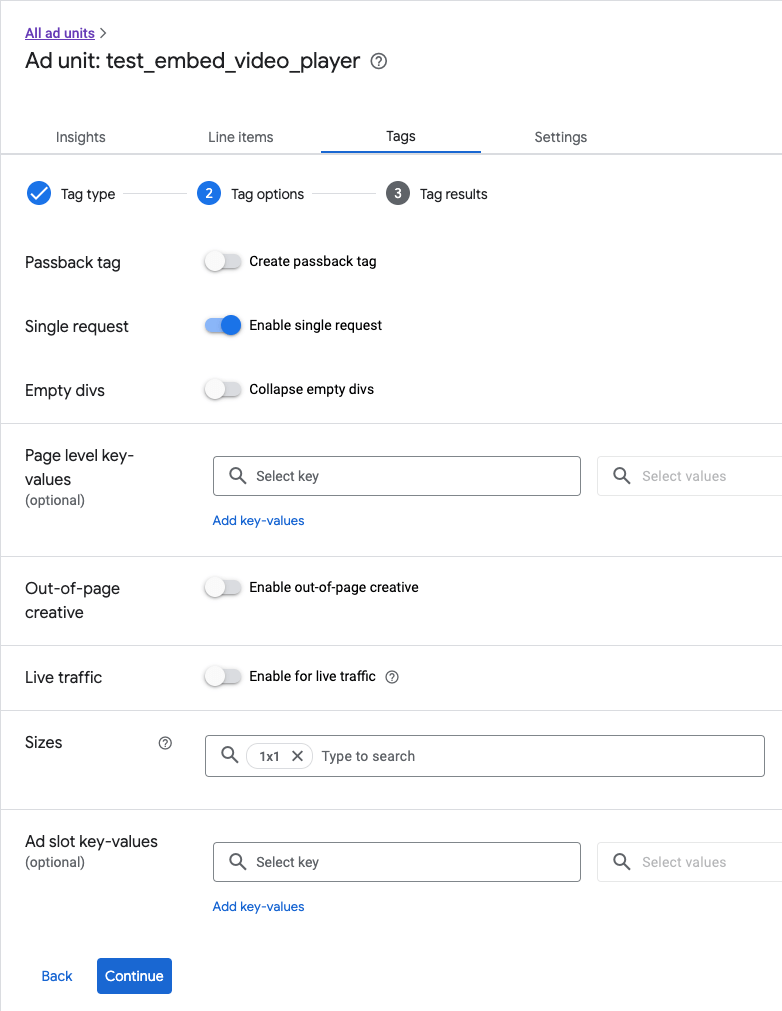
H. The Tag options settings page should look like this:
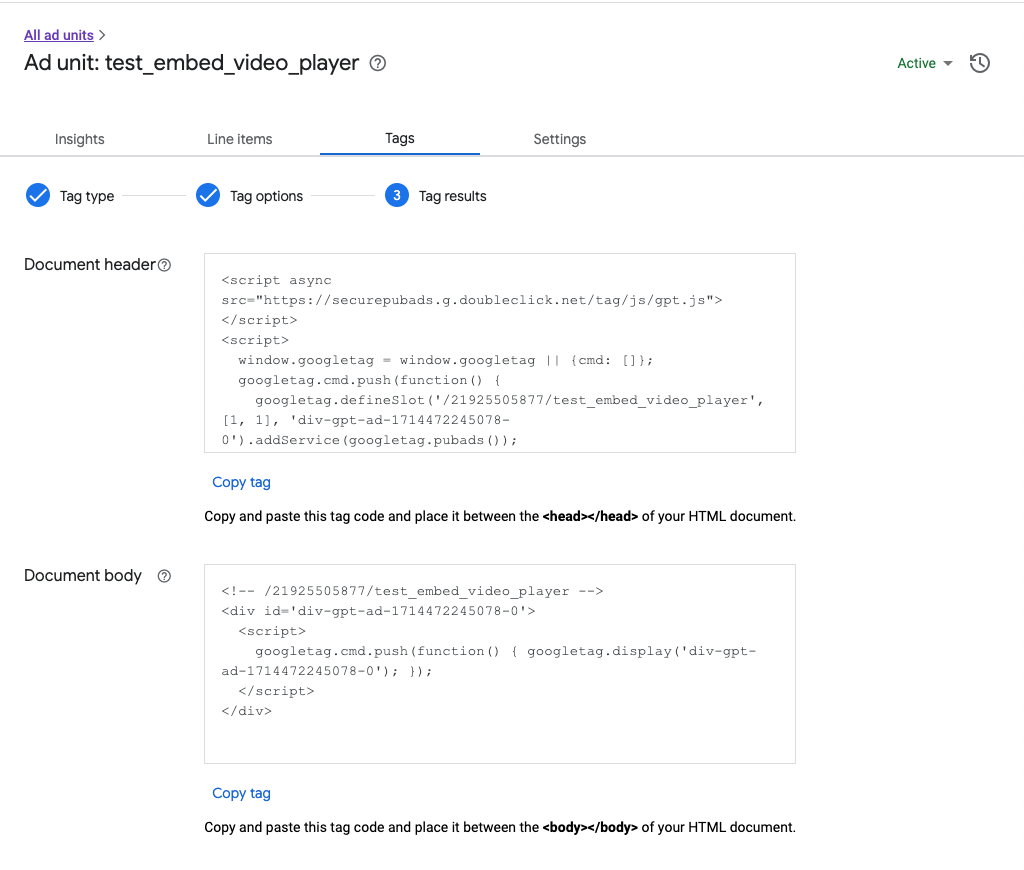
In the Tags results settings page, you will receive the below scripts. Please copy and paste the document header tag in the section of your HTML.
PLEASE NOTE: I recommend you implement it in your Test or QA Environment prior to going live.
Step 2: Create Line-Item (+Order)
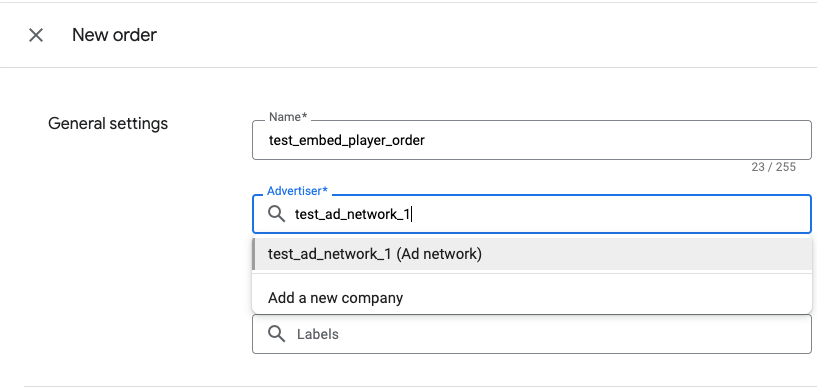
A. Go to Delivery tab > Line Items and click on New order.
Enter a Name and Advertiser (Add a new company), then click on ADD LINE ITEM.
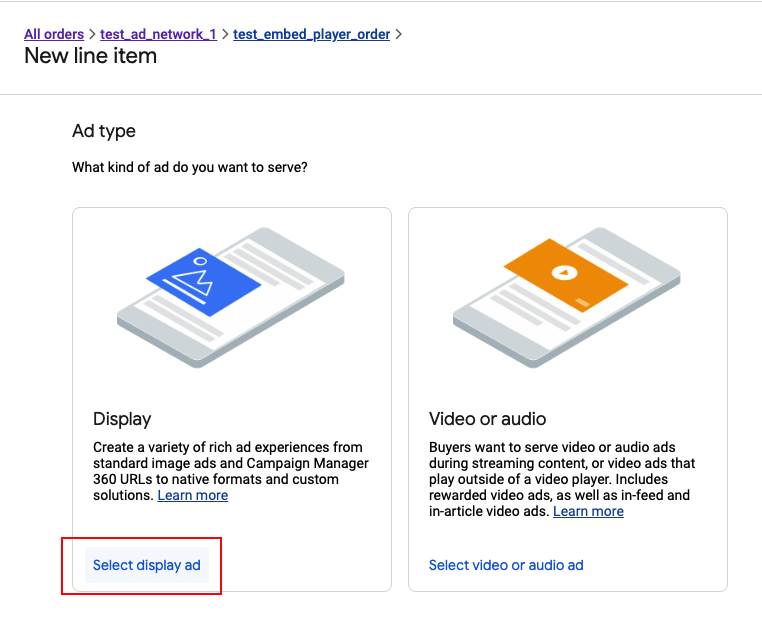
B. Click on "SELECT DISPLAY AD" for the Ad type setup.
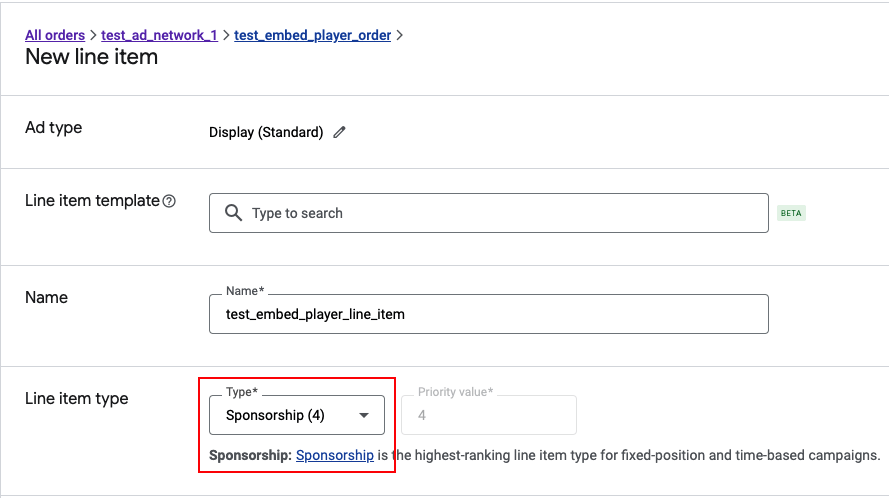
C. Select the Line Item Type as Sponsorship:
D. Select the Expected creatives to be the size chosen in the AdUnit
Need to match to ad unit size, please choose 1x1 size.
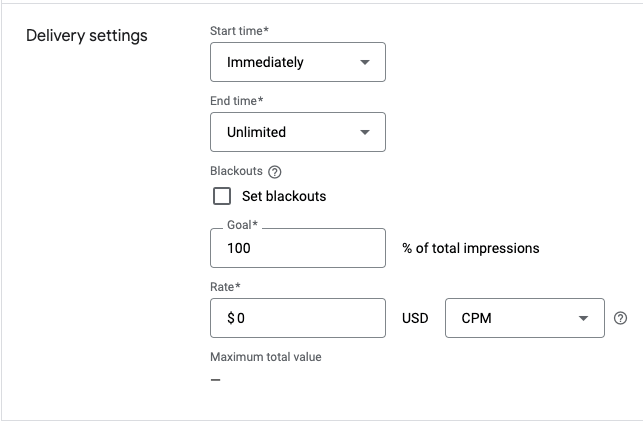
E. Delivery Settings: Select Start time Immediately and End time Unlimited and Goal 100%
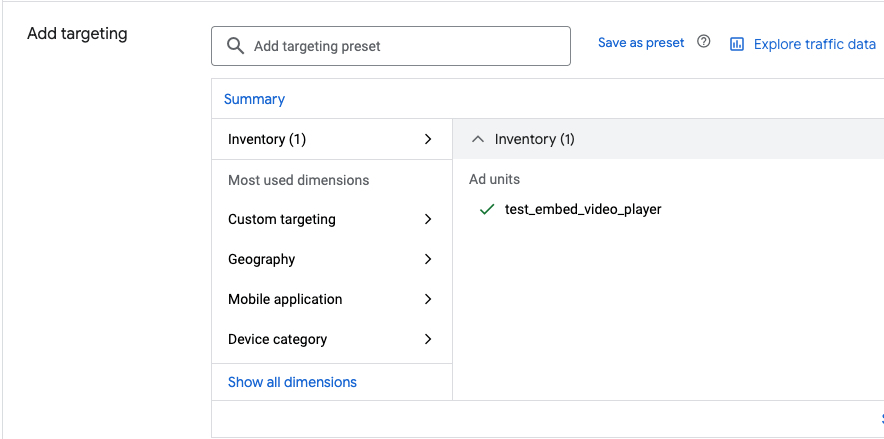
F. Add targeting: click on Inventory and select the AdUnit created in Step 1.
G. Click on SAVE.
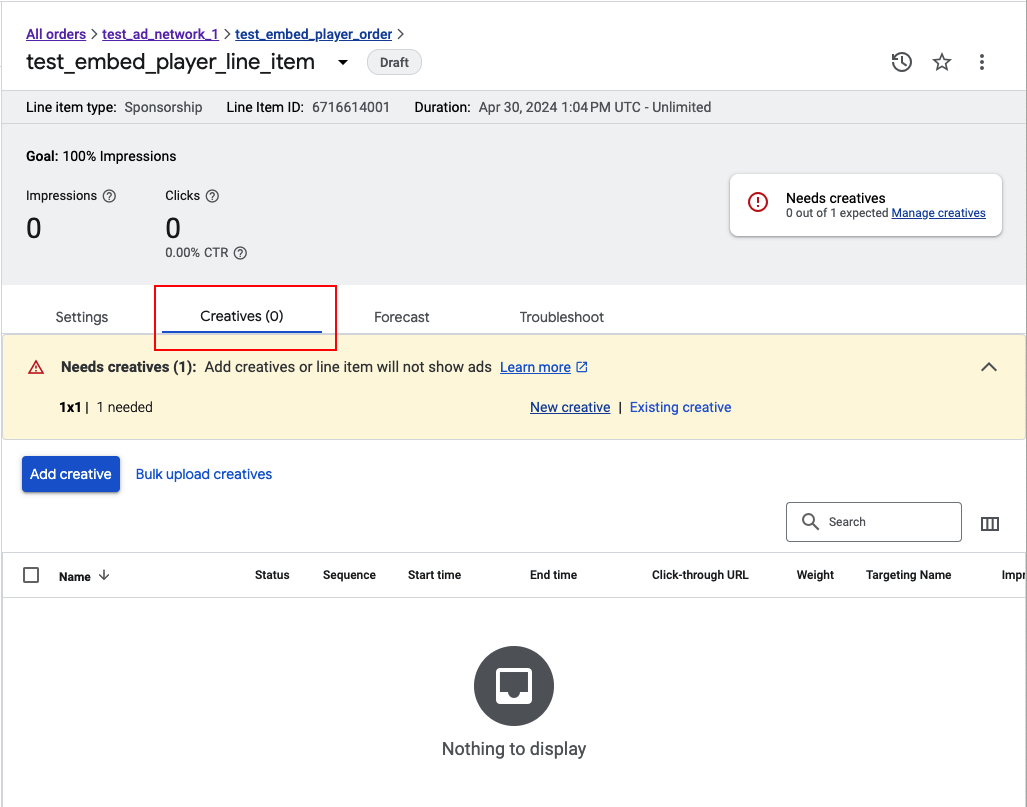
Step 3: Add Creative
A. Click on tab Creatives.
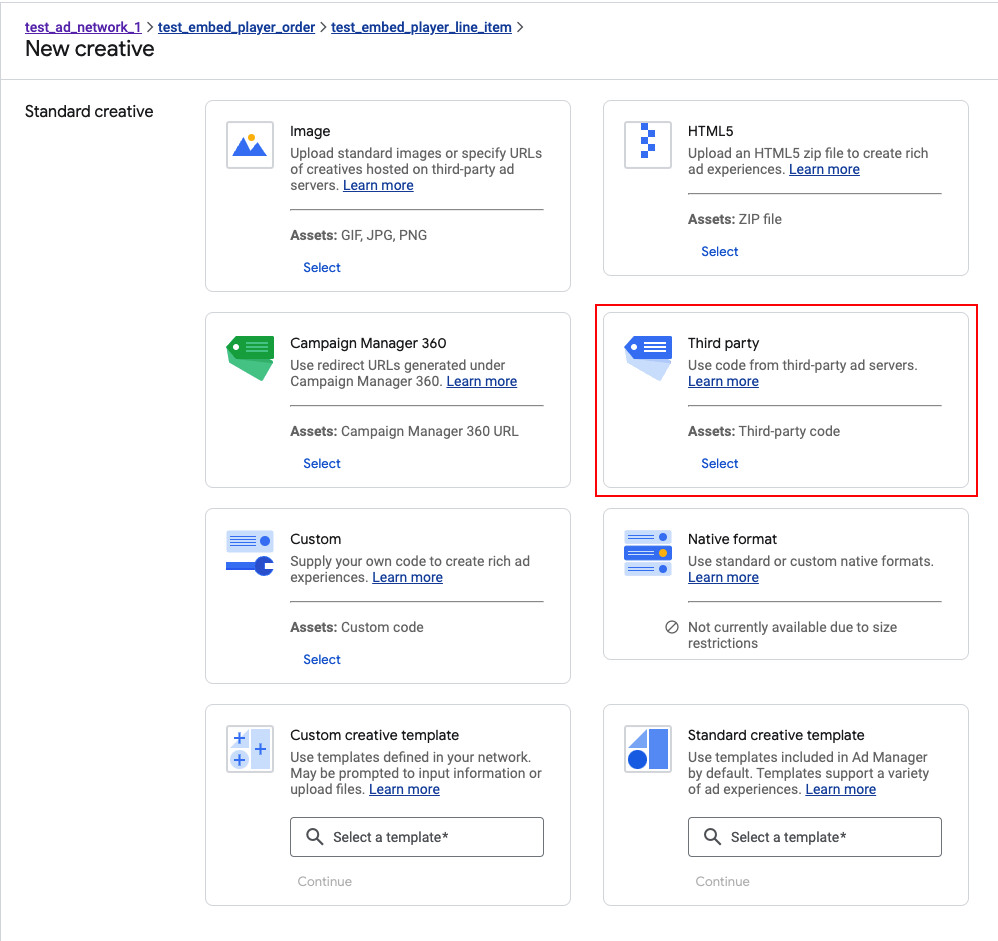
B. Click on ADD CREATIVE, select “New creative” > select the size 1x1.
C. Select "Third party".
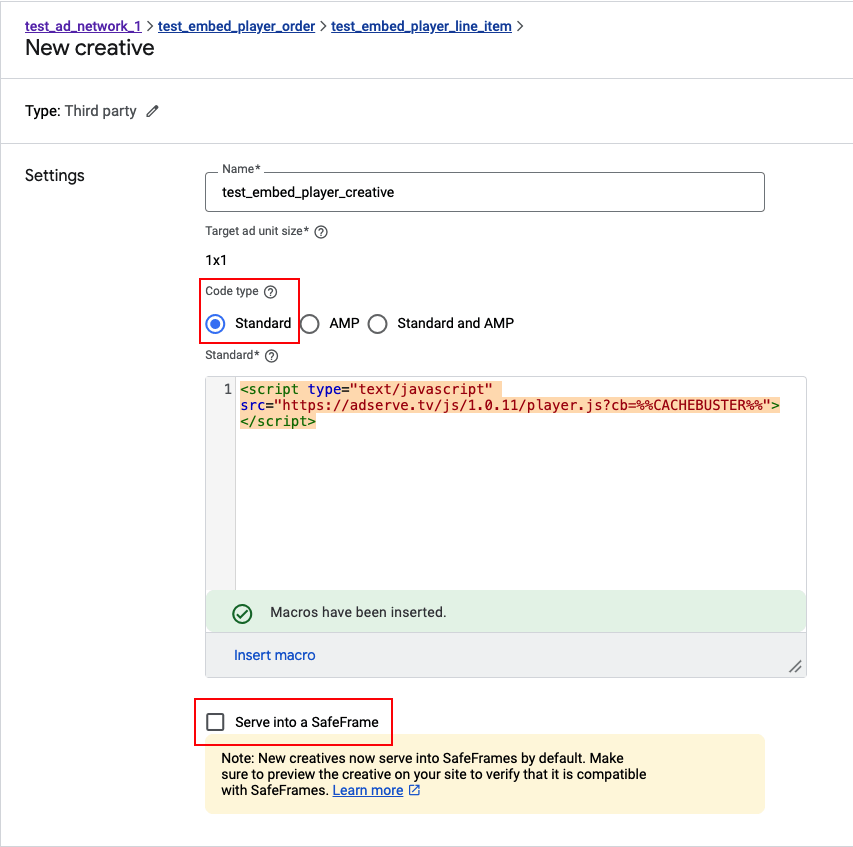
D. Select the code type: “Standard”, paste the Javascript code of the player and uncheck the “Serve in SafeFrame” checkbox.
E. Click SAVE.
Step 4: Activate Line Item (Approve Order)
A. Go into the Order created in Step 2B.
Click Approve, your Line Item should change from Draft to Ready
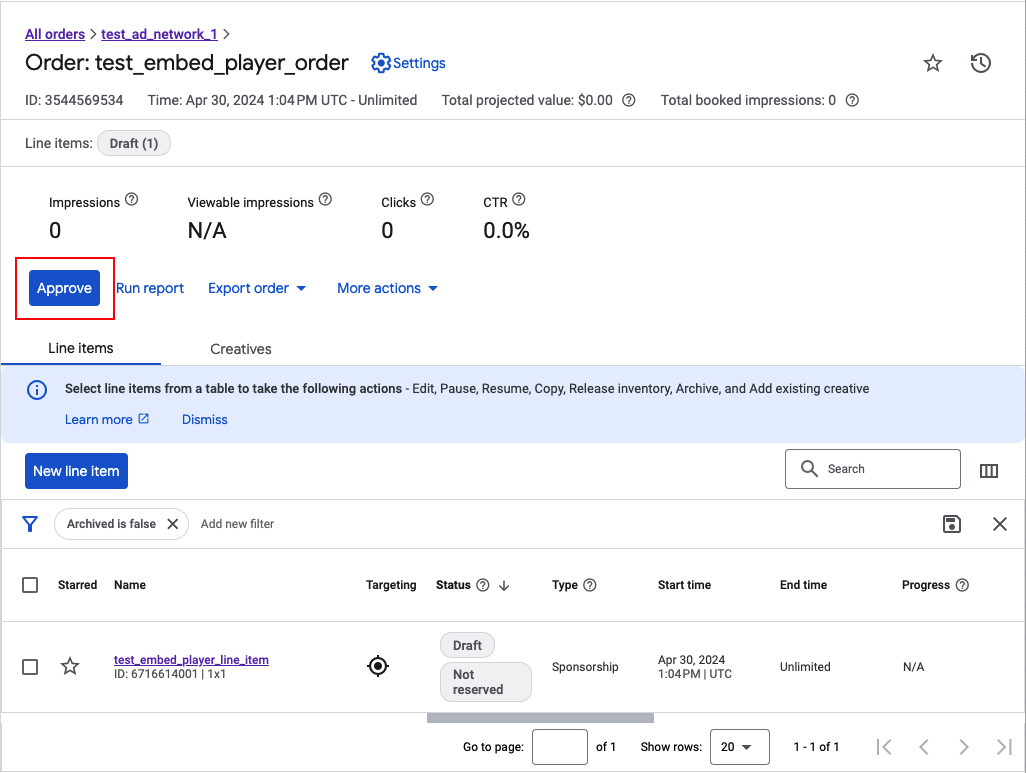
PLEASE NOTE: The Line Item Status will only change to Delivering once it has delivered one impression.
The AdUnit can take several hours from being created to being active.